|

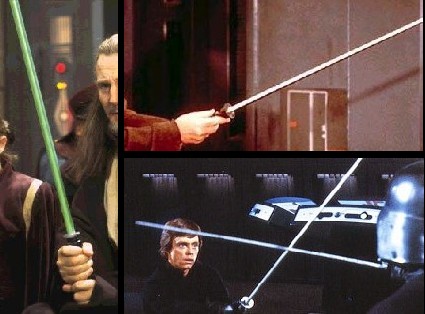
A Stunt Saber is what most
of us think of when we think of saber dueling. Stunt Sabers are lightsaber
props where the hilt is designed to resemble another prop lightsaber hilt, primarily
used in filming or taking photos. They usually have thin poles sticking
out of them so that they can duel with them, and know where the blades are going
once the picture of movie is finished. You can made stunt sabers out of
nearly anything: wooden dowels, PVC, plumbing tubing, broom handles,
etc. I personally like to use PVC for a few reasons. First off, it
doesn't splinter or break nearly as easy as wood. Secondly, when a PVC
blade is built onto a PVC hilt, it fits so tight, you have to hammer it
together, which means no wobbly blades. This tutorial will teach you how
to make PVC stunt sabers.
Under Construction; please bear with me
while I straighten everything out. As I go, I will add step-by-step
photos, as well as pictures of my finished stunt blades and anyone else's who
wants on the site.
|
|
Step 1:
Design
The first part of
building stunt saber is to have a design that you like...that is half the
battle.
Step 2: Cutting
Assuming that you have already made a hanging version of the hilt, gather copies
of any templates you might have used when cutting the special parts of the
hilt. Adjust these designs to fit on the 1" PVC, then dremel out what
must be taken out. Repeat as needed until all parts are accounted for.
Step 3:
Mounting
Take a piece of 3/4" PVC, and cut to length of original hilt. Next,
take the 4 ft piece of 1/2" PVC, and sand down one end of it the same
length as the piece just cut out of the 3/4" PVC. This will allow the
two tubes to slide together. BE CAREFUL NOT TO OVER SAND IT!!! If
you do, the blade will not fit in snugly like it should. Take your time
with this. Remember, it is easier to sand some off, then put some back
on. Once the pieces fit together firmly, make sure the two ends are
flush. If so, place a hefty coat of PVC cement so to be sure the two
pieces hold together. Allow cement 1 hr dry time before continuing the
saber building process.
Step 4:
Construction
After the 1 hr, check the cement to make sure it is good and dry. Once thoroughly
dry, take the pieces cut from the 1" PVC [see step 2], and sand down the
inside of them so that they can fit over the 3/4" PVC. Be careful not
to over sand. If one cannot sand the inside of the 1" pieces, then
evenly sand down the outer layer of the 3/4" pipe until all pieces fit on
snugly. Apply a layer of PVC cement to the edges of the 1" pieces,
making sure to get each side of each piece, and applying enough to hold it in
place without doing too much. If you do get too much on there, wipe of
with clean shop rag before dry, and re-apply. If you plan on doing some
serious sparring with these, and you would like a little more secure or a hold,
put some screws in the sections to keep them in place.
Step 5:
Painting The Hilt
Now, the painting is likely the part that makes the stunt saber so believable.
While it might not have all the little details that the hanging version does,
such as a cell phone clip or D-ring to attach it, and little LEDs, and a
multitude of knobs and thumbscrews, as long as the paint scheme is the same,
only someone who is looking for a difference will find one. With the hilt
in your hand, then you will not be able to see all the little extras, and they
may not be comfortable to fight with, so why add them? Use painters tape
to tape off the fist 6-10 inches of the blade area, and paint the actual hilt
its base color [silver, black, copper, gold, etc.]. This will cover the
screws used in Step 4 to secure the sections. Allow that to fully
dry, then apply two coats of crystal clear sealer, allowing through dry time for
each coat. If another color is needed for the hilt itself, tape off what
you will leave the base color, and then spray on the other color[s], allowing
dry time and 2 coats of sealer between each color of paint. Repeat step as
needed. AFTER ALL
COLORS ARE ON, take off all the tape, and seal the whole exposed hilt two more times and allow to dry overnight.
Step 6:
Painting the Blade [OPTIONAL]
This step is totally optional. You may want to leave the blade the raw
color of the PVC, you may want to cover it in foam or tape. After the hilt
is totally done, use the painters tape to tape over the ENTIRE hilt. Remember,
don't use any tape on this. If you use electrical tape or duct tape, you
will peel the paint off the hilt you worked so hard on. You might even
want to tape on a paper sleeve is you used high-gloss paints, because painters
tape will mess that up pretty bad. After totally
covered, grab neon color of paint chosen, and paint the top half of the
blade. Allow to dry, then paint to bottom half of the blade. After
totally covered, give 1 hr dry time, then put another light coat on entire
blade, allow to dry, then apply 4 coats of sealer, allowing adequate dry time
between each coat. Then, wrap in a thin, tight layer of clear plastic
wrap, and take a hair dryer to it. That will help to preserve the paint on
the blade itself. Do this step two times at the least, and make sure each
layer is tight, and it doesn't bunch up at the edges.
If you are
thinking "Hey, but this doesn't look exactly like my original saber",
you would be right! Stunt sabers are not designed to look like the
original hilt, they just need to be similar. The fact of the matter is
that no one will ever seen the stunt saber up close or in great detail. If
you are taking pictures with the stunt saber, then your hands will be covering a
good deal of the hilt itself. If you are using it to make a fight scene
for a FanFilm, you will be far enough away to not be able to tell the
difference. It might not have all the little extra goodies on it that make
it YOUR saber hilt, but it doesn't have to...it just has to resemble the
original hilt, and function. As long as you did that much, you are good.
|

